Showing posts with label teach. Show all posts

Saturday, June 23, 2012

Soap Weekend Intensive 2012

Detailed post at the Soap Queen Blog!
Me getting crazy with the sugar!
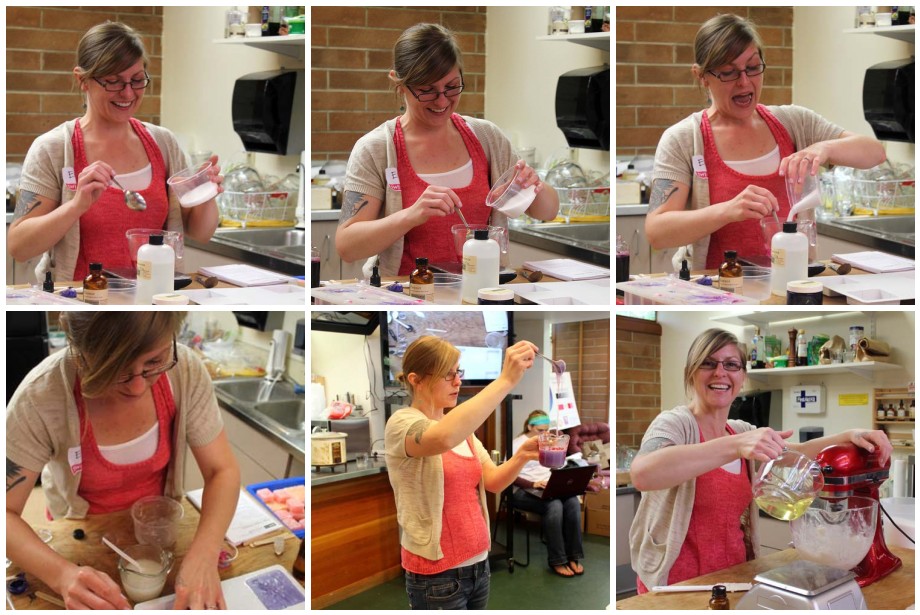
Last weekend I had the pleasure of teaching at Otion's Soap Weekend Intensive, a once a year weekend packed with top notch instructors teaching an array of Bath and Body recipes and techniques! I was so honored to be asked to teach Sugar Scrubs this year! We did a Whipped Scrub, Sugar Cubes and a Salt Glow! All recipes specially created for the SWI!

Thanks to Anne-Marie, Kat, Debbie, Kim, Courtney, Amber, Kristin, and little Jamisen! You guys made my stay amazing!

You can get all of the deets over at the Soap Queen Blog!

Otion does classes year round. If you are in the Bellingham Washington area or just want to fly up for a private lesson you can see the schedule here: Otion Soap Classes

Saturday, January 15, 2011

Simply Sweet Sugar Scubs Classes are Back at The Nova Studio! March 12th 2011

Last September I had the opportunity to teach at the Nova Studio in the California Bay Area. My Simply Sweet Sugar Scrub class sold out and the eClass has been the highest selling eClass for the Nova Studio since! We are bringing it back this Spring 2011 with two classes and new scrubs!  I will be showing you how to do the Sugar Cubes, the Lip Sugar Scrub and the Sugar Whipped Soap as well as a new papaya Enzyme Foot Scrub and a new Whipped Sugar Scrub with all natural ingredients!

Here is something nice someone said about the class:
"I absolutely loved this class. Erin was very knowledgeable and forthcoming about the scrubs and her soap business in general. I would recommend this class to my friends and family." – Michelle Ember. Click here for more comments on the class!

Class Date & Times:
Saturday March 12th
9 am - 1 pm or 2 pm - 6pm
$99 plus $35 materials fee

What you will take home!

Awesome handouts and a bunch of products: a 10 oz jar of Body Sugar Cubes, a 4 oz jar of Whipped Sugar Scrub, a 4 oz jar of Sugar Whipped Soap, an 8 oz jar of Papaya Enzyme Foot Scrub & two adorable pots of Exfoliating Sugar Lip Scrub. Erin will supply everything you need, just show up with your sweet self, ready to learn & have fun!

To sign up visit the class page on the Nova Studio Website!


Overview:
Whipped Sugar Scrub (all-natural, from scratch): Demo & Hands-On: This product is a combination of a body butter and a sugar scrub. The consistency is like very thick frosting. Students will watch a demo of the batch being made by Erin, then they'll get to choose which essential oils to use for scent & choose a color.
Sugar Whipped Soap (using a base): Demo: The consistency of this scrub is light and fluffy with just enough foaming action to get you clean and soften your skin. This recipe utilizes a pre-made base that contains the foaming agents as well as the preservative, so you don't have to worry about that. Erin will make this batch demonstration style and students will get a 4 oz jar to take home & try.

Papaya Enzyme Foot Scrub: Hands-On: An invigorating, more intense scrub made especially for your feet that contains different types of sugar, papaya (which contains a natural exfoliating enzyme), oils, butters, a natural cleansing agent and an emulsifier (to make it more creamy & less oily).

Body Sugar Cubes: Hands-On: A single-use sugar scrub that uses a melt & pour soap base, mixed with oils & butters to cleanse & exfoliate at the same time, leaving NO oily mess in your tub. Take home a big jar of cubes, custom scented & colored by you!
Exfoliating Lip Scrub: Hands-On: Made from scratch, a wonderful blend of waxes, oils & butters to gently exfoliate lips while helping to seal in moisture. A very popular scrub, for all ages.


Wednesday, March 17, 2010

Join me at the Soap Weekend Intensive at Otion!

If you haven't seen on the Soap Queen blog yet I am happy to announce that I will be teaching glycerin soap techniques at the Otion Soap Weekend Intensive August 13th, 14th and 15th in Bellingham Washington! Other classes are Cold Process soap, Liquid soap and Lotion Making! It will be a jam packed weekend of learning and fun, not to mention beautiful Pacific Northwest summer scenery!

It is my first time teaching at the SWI (so go easy on me) and I am so excited, absolutely giddy really, that I will be teaching this summer! A big thanks to Anne-Marie for inviting me!

Here is one of the projects I will be teaching
 You can register here: 2010 Soap Weekend Intensive
I hope you'll join us!

Friday, January 8, 2010

Tutorial: Sweet Treats Mini Soap Chocolates


I always love to give handmade goodies for holidays and I think these little soap chocolates are the perfect Valentine's Day gift for a sweetheart or even friends and co-workers. They are simple and budget friendly! I hope you enjoy it!

Materials:
• 12 oz. of Bright White glycerin soap
• 8 oz. of Naturally Clear plus 4 oz. of Bright White glycerin soap
• two, 2 cup microwave safe glass measuring cups
• Wilton Bite size brownie squares pan
Strawberry Fragrance Oil
Dark Rich Chocolate Fragrance Oil
Non Bleed Red Liquid Color
Brown Oxide Liquid Color
• two, 2 or 4 oz. Plastic Squeeze Bottles
• Rubbing Alcohol in a Spray Bottle
a simmering pan of water (optional)

Directions:
1) Melt 12 oz of white soap in microwave - about 2 minutes. Add 6 drops of Non bleed red color, less or more depending on how light or dark you would like your pink, and 4 ml of Strawberry Fragrance. Set aside
2) Melt 8 oz of clear soap base plus 4 oz. of white soap base in microwave - about 2 minutes, Add 30 drops of Brown Liquid Oxide, more or less depending on how light or dark you would like the chocolate color, and 4 ml of Rich Dark Chocolate Fragrance Oil. 

here are the colors you are looking to get

3) Pour about 1 oz of pink soap into one squeeze bottle and about 1 oz of Chocolate Brown soap into the other squeeze bottle. If the soap starts to set up, place the bottles in a pan of simmering water until the soap is liquid again.
4) Working in only 12 of the mold cavities, make thin lines of soap across the mold in a diagonal motion using one of the soap colors. You may get a little pooling depending on how hot the soap is – this is ok! Repeat in the remaining 12 cavities with the other soap color. Let set for about 5 minutes.

I make the lines across the entire mold but if you are less messy than me,  you can concentrate the lines within the individual cavities. The lines will just be thicker if you do that.

5) Make sure the soap in the glass containers is at about 120 degrees, not too hot to melt the soap and not too cool to look goopy. Let cool or heat as needed. Spray the brownie mold with a generous amount of rubbing alcohol coating all of the soap lines. 
6) Pour the pink soap in the mold cavities with chocolate brown stripes and the chocolate brown soap in the mold cavities with the pink stripes. Spray with rubbing alcohol to remove air bubbles and let set about 1 hour until the soap is completely firm.


7) Pop out of the mold and you are done!

Variation: Once you get the hang of the squeeze bottles you can make other designs such as hearts, swirls or dots.


Packaging ideas:
Stack soaps in a wide mouth glass apothecary jar. Decorate with an antique key to your heart and a handmade heart tag and finish with ribbon!
 
4 soaps fit perfectly in a 3.25 in square by 1 inch box. Add a little paper shred in the bottom of the box, place soaps, and finish with a ribbon and handmade tag.


Add pink wood shred to the bottom of a shallow tin and fill with soaps! What  a nice surprise when the lucky recipient opens the box!


resources:

LinkWithin

Related Posts with Thumbnails