Saturday, June 23, 2012

Soap Weekend Intensive 2012

Detailed post at the Soap Queen Blog!
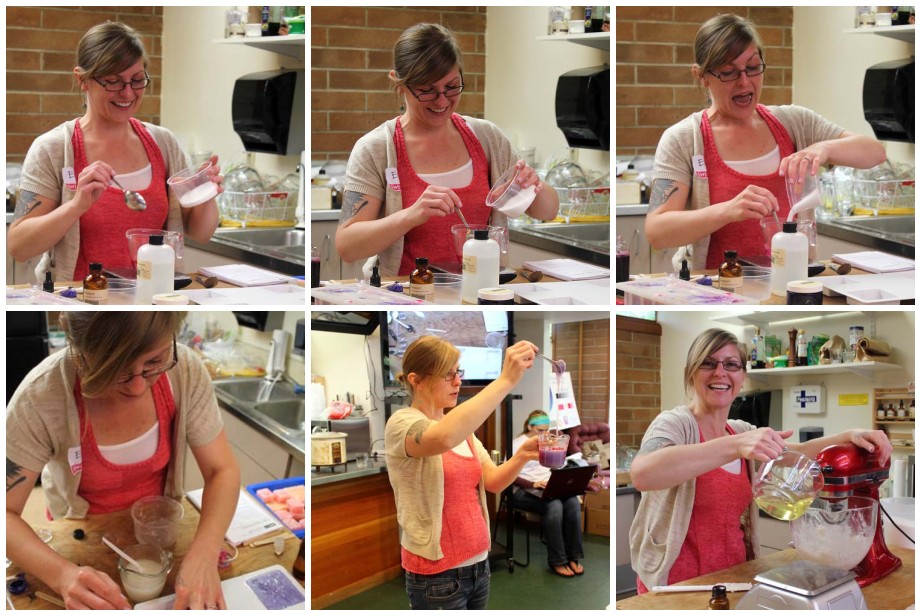
Me getting crazy with the sugar!
Last weekend I had the pleasure of teaching at Otion's Soap Weekend Intensive, a once a year weekend packed with top notch instructors teaching an array of Bath and Body recipes and techniques! I was so honored to be asked to teach Sugar Scrubs this year! We did a Whipped Scrub, Sugar Cubes and a Salt Glow! All recipes specially created for the SWI!

Thanks to Anne-Marie, Kat, Debbie, Kim, Courtney, Amber, Kristin, and little Jamisen! You guys made my stay amazing!

You can get all of the deets over at the Soap Queen Blog!

Otion does classes year round. If you are in the Bellingham Washington area or just want to fly up for a private lesson you can see the schedule here: Otion Soap Classes

Friday, June 22, 2012

A Soap A Day Project: Day 14

When I was a kid I thought I was so smart! All of the smart people on TV, and grown ups at my grandparents house knew how to play chess. I was saying some arrogant little kid thing to an adult about how I knew how to play chess and that made me smart, and I forget who had to break it to me that I was actually playing checkers! It was a cruel day!

A Soap A Day Project: Day 13

I like working with all clear soap and brightly colored embeds! Gotta LOVE clear M&P!
Ok, I have officially lost track - I have random bars of soap laying around that I have to take pictures of! Not that it is that hard - the pics are all pretty standard! This is the soap I made for Wednesday so I guess I am only a day behind.

This soap really made me mad! I had thin little delicate strips of soap cut and I could not for the life of me get them to stay upright in the mold so they all fell over! My big clumsy fingers got in the way, I tried tweezers but my hands weren't steady enough. It could be that it was about 2 hours past my bedtime once I was finished with this. Also, once I poured the clear soap all the embeds moved out of place. You probably can't really tell but there should have been thinner stripes and more of them, very carefully placed in straight rows. I am going to try this one again for sure!
So I am a day behind and I find myself working on things for too long, in order to get a result that may not be better. This is a pattern! I spent a really long time researching new packaging yesterday rather than filling my last order for the week so now I am going to have to work for part of tomorrow. I don't NEED to redo my packaging but I NEED to make soap for my customers! I was just more interested in the packaging at the time! Silly me! FOCUS FOCUS!

Wednesday, June 20, 2012

A Soap A Day Project Day: Day 12

The Updated picture!
Whew - almost missed it! It was dark when I finally got around to taking this picture after a busy day of production and a great workout at the gym. I will get a better pic to change out tomorrow. There is a 3D effect going on with this one that might be hard to see at this angle.

PROCRASTINATION is the word of the day! I didn't have a list of what I needed to get done and I wasted a lot of time! I need to make a more clear cut schedule for myself and assign time slots to projects so I don't go overboard on some things and neglect other things!

Some good news! I have a meeting set up with one of my local retailers to get my entire product line on their new website for sale! Whoo Hoo! I also have a proposal for them to customize their instore display. It is kind of a prototype that I want to test out with someone I have a good relationship with before making it an official product! I want to work on my branding so I am looking at offering displays for my Soaps and Lip Balms with my logo center stage and more memorable!
This is an in progress photo. I am now photographing the projects and steps as I go so I can recreate the projects later for a book of Tutorials! Looks messy huh? There is a lot of clean up involved with these to get a polished final soap!

Overgrown Mint - What to Do!

Flank Steak with Key Lime and Mint Marinade, Mango Peach Salsa and Roasted Veggies! 
Healthy and Low Carb!  

The mint in my garden is out of control! The stuff kind of grows like a weed anyway but mine is out of the planter boxes and is invading the yard! I harvested most of it to dry and use in soap and tea, and kept some fresh to use for cooking. Key limes were also on sale so I bought a pound of those and wanted to see what I could do with Lime and Mint for this weeks menu. Also, having been gone for a few days meant that all of the fresh fruit and veggies I had in the fridge were about ready to GO so I came up with some recipes to utilize the Mint, Limes and produce - I hate to waste food!
Key Lime and Mint Marinade
Ingredients:
• 1/4 C. Fresh Mint Leaves washed and chopped
• 4 Cloves of Garlic peeled and rough chopped (more if you like!)
• 1/4 C. Fresh Key Lime Juice
• 2 T. Olive Oil
• 2 T. White Wine
• 1 T. Honey
• 1 t. Chile Paste or one small chopped Chile
• 1 t. Fresh ground Pepper
• 1/2 t. Kosher Salt

Throw everything into a small food processor and blend until smooth! This marinade is great for Meat and Poultry. I encourage you to try it on fish but the flavors might be too bold for mild fish.

Score a 2.5-3 lb flank steak on both sides across the grain. Place in a freezer bag and pour the marinade over the steak making sure the whole steak is covered. Marinate for 2-4 hours.
Mango Peach Salsa with Key Lime and Mint
This Salsa goes SOOOO well with the marinated Flank Steak!

Ingredients:
• 1 Ripe Mango peeled and chopped
• 3 Ripe Peaches peeled and chopped
• 1/4 C. Fresh Mint Leaves Minced
• 1 Green or Red Chile roasted, peeled, and chopped. Any works, as hot or mild as you'd like! The Chile I used was about 2 T. chopped
• Pinch of Kosher Salt and Fresh Ground Pepper to taste

Mix everything together in a bowl, cover and refrigerate for one hour to let flavors mix!
TIPS and CAUTIONS:
BE VERY CAREFUL when working with Chile Peppers! I like to wear gloves but if you are working with bare hands be sure to not accidentally rub your eyes or nose - it will BURN!

To Roast a Chile place it on the middle of your baking rack and roast at 400 degrees until the skin blackens and starts to separate from the flesh of the pepper. After Roasting the chile wrap it in a plastic wrap for 5 -10 minutes until it is cool to the touch. It will steam in the plastic and this will help you to remove the skin. Let the Chile cool completely since escaping steam can also burn your eyes and nose from heat and Capsaicin.

You can scrape out the seeds or leave them in. The seeds are very hot and will add a great deal of spice to the salsa.
Roasted Veggies!
You can use any Veg that you like - here is what I used:

• 1 Red Bell Pepper
• 1 Yellow Pepper
• 3 small to medium Zucchini (I think this is actually a fruit)
• 1 Sweet Onion
Toss in:
• 3 Cloves of Garlic Minced
• 1 t. Ground Rosemary
• 3 T. Olive Oil
• 1/2 T. each of Kosher Salt and Fresh Ground Pepper

Wash the veggies, de-seed the Peppers and remove the skin from the Onion. Cut the pepper and Onions into large chunks. Slice the Zucchini lengthwise.

Toss in the Oil, Garlic, Rosemary and Salt & Pepper. Spread on a cookie sheet and roast in a 400 degree oven for 25-30 minutes until the veggies are tender. If you like the veggies less cooked then try 10-15 minutes.

Flank Steak!
Let the Flank Steak come to Room Temperature and remove from the bag. Pat dry with towel paper.

Fire up the Grill and coat the rack with oil. The grill is hot enough when you hold your hand about an inch over it and you can only hold it there for about a second. Grill the steak on about 4-5 minutes on each side for medium.

You can also cook the Flank Steak in a Cast Iron Skillet on the stovetop. Get the skillet nice and hot, coat in oil and cook the steak for 4-5 minutes on each side for medium.

When cutting the flank steak to serve it is best to cut think slices across the grain. This cut of Meat can be tough if cut with the grain!

Put it all on a plate and eat it up! 

You will have lots of leftovers! Steak sandwiches anyone????


Tuesday, June 19, 2012

A Soap A day Project Days 9-11

 I want to continue more on this Mother of Pearl thing. I was browsing the interweb and came across a Mother of Pearl inlay box and then searched for Mother of Pearl and the look translates well into Melt and Pour Soap! The possibilities are endless!
I was desperate for this one! I was hanging out for the Cold Process class at the Soap Weekend Intensive, helping to clean up and realized I hadn't made my soap for the day! I scraped out all of the leftover soap from the mixing bowls students were using, and managed to put together enough soap to make this little 2 ouncer! I used a paper coffee cup for the mold and random micas that were laying around to attempt to do a swirl on top. It is scented with lavender and peppermint - two of my favorites, so I may end up using this one! I am definitely adding a Lavender peppermint to the all natural line!
This was made on Sunday after teaching a scrubs class. Debbie of Soapylove taught a Neon Melt and Pour class earlier in the morning which was so fun so when I saw this mold at Otion I just had to do something with it! I love the detail in the mold! It was fun to play with!

A Soap A Day Project: Day 8

I was fortunate enough to be able to continue this project while on the road visiting Bramble Berry and Otion! It got a little banged up in transit home! The inspiration is pretty self explanatory - traveling!

LinkWithin

Related Posts with Thumbnails